HELLO!
when I started sewing and fell in LOVE her patterns. She has a super sweet blog with tons of great free tutorials.
Rachel, thank you so much for guest posting and putting together such a sweet tutorial for us! I can't wait to make this baby blanket for my new baby niece!
**************************************
Hello! my name is Rachel Stellato. I live in Maine with my husband and 2 year old daughter. I started crafting my own patterns a few years ago and opened up my
Etsy shop just last year--mamastellato.etsy.com--. I sell PDF patterns for girl's clothing ranging in sizes from 6M up to 5/6T. I will soon be adding a few boy/unisex patterns to the shop so you can be looking for them soon! If you want to stay updated on the happenings around here and my shop you can follow my blog (www.mamastellato.com
). I have a few easy tutorials which are perfect for beginners on my blog under the 'tutorials' tab. Thanks and Happy Sewing!
I love making baby quilts. This one takes a little more time to make because you need to cut and sew the the quilt top together instead of using 1 piece of fabric as the front. It's still so simple though! The appliqued letter makes the quilt extra special and adds a personal touch. You could also applique a butterfly or owl instead of the letter if the baby's name is still undecided.
Here are some great tips from Fabric.com's blog for working with minky fabric.
*All seam allowances are 1/4"
You will need:
30 6"x6" fabric squares
4 strips of white fabric for trim
(2) -2 1/2" x 32 1/2"
(2) -2 1/2" x 31
1 yard minky fabric
wonder under
card stock (to print letter on)
typical sewing supplies
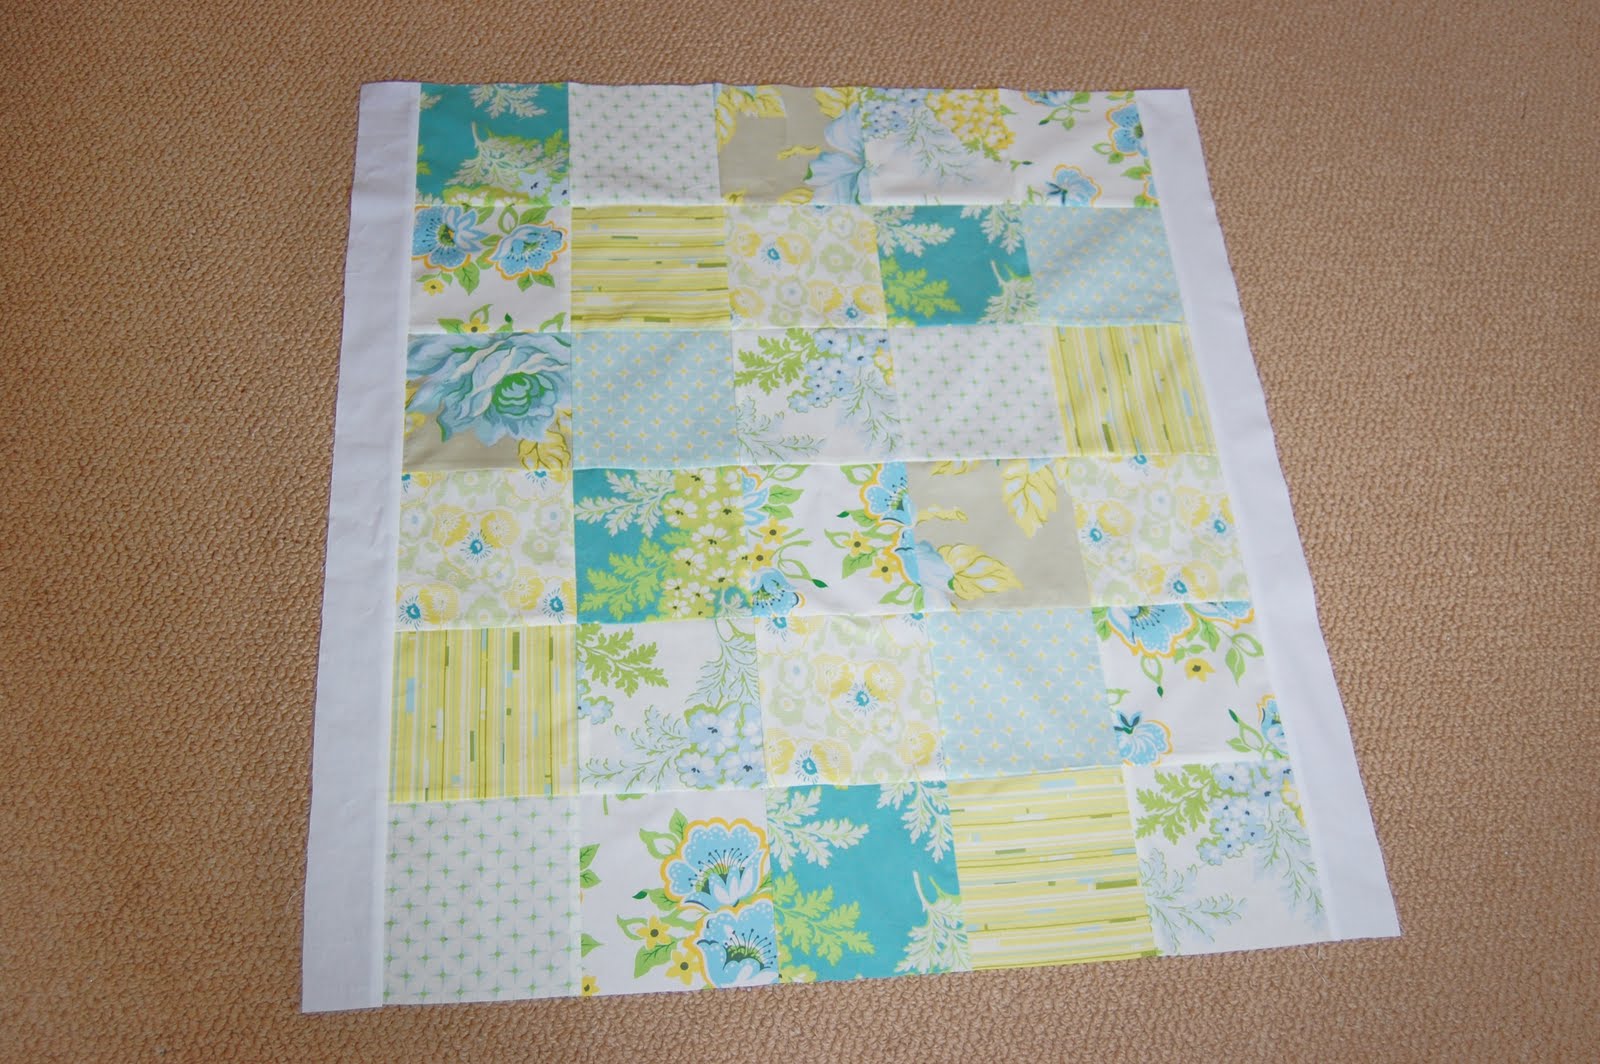
Lay out your squares randomly in 6 rows of 5. Arrange them until your happy with the placement.
Start sewing the squares together by row.
Press the seams in the 1st row to the left, the 2nd row to the right, the 3rd to the left and so on. Sew the rows together and then press the seams.
Pin and sew on the trims, starting with the sides. Press the seams.
Lay out the backing and then lay your quilt top over it.
Cut around the quilt top leaving an extra inch of the backing all around.
Print your letter onto the sheet of card stock paper and cut it out. Follow the instructions on the wonder under for creating your applique letter. Iron the letter on being very careful not to melt the minky fabric. Try to only touch the letter with the iron if you can. Stitch around the edge of the letter.
Lay the backing and quilt top back out with the right sides together. Smooth out the lumps and bumps.
Cut around the quilt top removing the extra inch of the backing and making both pieces the same size.
Pin around the sides and sew leaving about a 5" gap for turning.
Turn the quilt right side out.
Turn and press the edges of the opening in 1/4" and then slip stitch closed.
With the front of the quilt up, press the edges of the quilt. Top stitch around the quilt and you're done!

This quilt was made with Heather Bailey's Nicey Jane line. I love the fresh, springy feel of it.
I hope little Miss Lyddie Ann likes it too!