Pages

Photobucket Photobucket Photobucket Photobucket Photobucket Photobucket
Showing posts with label Recipes. Show all posts

Sunday, August 14, 2011

Kool-Aid Play Dough


My daughter's Kindergarten teacher had a sign-up sheet for play dough at Meet the Teacher day. I was really excited when I saw that we could make our own since she was not requiring the store bought kind! Coincidentally, the son of one of my best friends is in my daughter's class so we decided to have a play dough making party Friday after school! My favorite homemade play dough is Kool-Aid play dough. It has a surprisingly yummy scent and makes the dough a fun bright color.
Ingredients needed: 
Cooking Oil
Salt
Flour
Kool-Aid packet
Optional-food coloring if you want the colors richer

Time for Fun! Add 1 packet of Kool-Aid, 1 cup of white flour, 2 tablespoons of oil. 1/2 cup of salt and 1 cup of boiling water to a large mixing bowl.
Mix with a wooden spoon at first because it will be hot! When the dough cools enough, use your hands to knead the dough until the color is consistent and the dough is formed. When finished, place in an air-tight container or baggie for storing.
We had a great time making this, and I'm certain all the kids will all enjoy this yummy smelling play dough in their kindergarten class!

Sharing this at fun link parties here

Tuesday, August 9, 2011

Baked Blueberry Mini Doughnuts-Guest Chick Cooks

Can I just tell you that in posting this guest blog I have to hold back everything in me not to cheat today on Phase 1 of the South Beach Diet! These little guys look beyond yummy! Katie over at This Chick Cooks has some serious yummy creations! Her blog is absolutely wonderful and DELICIOUS! Also, You don't want to miss her Recipe Link Party  every Wednesday
Welcome Katie!

My name is Katie and my blog is This Chick Cooks. I am super excited to guest post here at Running with Glitter. Thanks for having me, Kelly! I love cooking and trying out new recipes or coming up with my own creations. I'm a self taught cook with a simple style. This Chick Cooks focuses on recipes using ingredients that any cook can get anywhere.  I share all types of recipes from healthy to indulgent, and every Wednesday I host a recipe swap where you can come and show off your amazing recipes. 


Today I want to share a recipe for baked blueberry mini doughnuts with a simple lemon glaze. Don't fret if you don't have a donut pan, just make them as mini muffins. These are super easy and sure to be a crowd-pleaser. We have tried lots of doughnut variations at our house and these are the favorites. I’d love for you to stop by and visit me at This Chick Cooks and maybe even show off a few of your recipes at The Recipe Spotlight every Wednesday. 

Baked Blueberry Mini Doughnuts Recipe (or mini muffins)
yields about 24-30 mini doughnuts

1 cup All-Purpose Flour
1/2 cup sugar
1 teaspoon baking powder
1/4 teaspoon salt
1 teaspoon cinnamon
2 tablespoons buttermilk (or regular milk)
2 large eggs
3 tablespoons vegetable oil
2 tablespoons water
½ cup blueberries

Mix all the dry ingredients in a bowl. Crush your berries with the back of a fork. In a separate bowl, mix together milk, eggs, oil, blueberries and water. Pour the liquid mixture into the dry ingredients and stir just until combined. Bake in a mini doughnut maker according to manufacturer directions. Alternatively, you can bake them in lined mini muffin tins for 7-12 minutes, or until a toothpick inserted in the center comes out clean. While the doughnuts are cooling make your glaze.

For the glaze:
1 cup powdered sugar
1 teaspoon lemon juice
Water

Mix together powdered sugar and lemon juice. Add water 1 teaspoon at a time until it reaches a thick drizzling consistency. Drizzle glaze over cooled doughnuts and enjoy!

Source: adapted from baked doughnut recipe at kingarthurflour.com

Sunday, July 31, 2011

Jar of Happiness for my Birthday

Tuesday is my thirty-something birthday and I wanted to make something fun for myself. A little happiness in a jar for my happy day please! These are great because I know that in no way during the week could I make a cake for myself. I can just put the lid on these beauties and store in the fridge until my day. (okay so we all ate one tonight but there is still 4 left...) 

I have seen these fun little cupcakes baked right in the jar over at Babble and had to give it a try myself.  {My birthday was the perfect excuse} It's an awesome tutorial but I wanted to make mine on a smaller scale and simplify the mess a little. 
I did make mine a little different and wanted to share with you all what worked for me.
1)Mix a white cake mix as directed. Separate into as many bowls as you want colors. (now that I think about it you could just mix the batter and food coloring up in the baggie and save a bowl mess)
2) Place each color of batter into individual gallon baggies. Cut a corner of the baggie off.
3)Using the baggie you just filled with caked batter, layer to fill each 1/2 pint jar halfway full of cake batter. If you fill it more than that, it will bake over and out of the jar.
4) Place on a baking sheet and bake at 325 for 45 or so minutes until your knife comes out clean.
5)Scoop the top of the cupcake off to make room for the icing.
 (it was a fun surprise to see how beautiful it was inside)

YUMMY!!! Happy Birthday to me!

linking up here

Wednesday, June 29, 2011

How "Not" to Make Ice-cream Cone Cupcakes

 Today I'm going to show you how Not to make Ice cream cone cupcakes. 
I know I have left out several steps but you will get the gist...
 Don't let my intro picture fool you. I'm thankful I took the picture before the real mess started.. 

 I found directions on the back of the Ice Cream Cone Box in our pantry. I have seen these super cute and yummy looking cones all over blog land and wanted to give it a try. I almost made these for my Daughter's Birthday but decided last minute just to order store-made cupcakes. Boy am I glad I did!

 As the directions state, add just 1/4 cup of batter to each cone because if you add more they will overflow.. Well, I did as they said and watched the batter ooze out of the cones for 15 minutes... That was fun!

 Remove from oven, then let cool.
 After frosting, carry your cake platter to its final destination. Unfortunately a few of the cupcakes' final destination was on my floor. The cool thing was when they hit the floor they make the POP! sound that your hear when you open a can of biscuits.. I love that sound. 
Clean up your floor.
 Arrange cupcakes face ugly side to the back so when people walk by they will say "Those look great, you are so clever!" Cover your platter... Uncover your platter and set back up the ones that just fell over.
Quickly Cover your cupcakes again and walk away......... Fun right?
Oh well, we gobbled them down. They tasted YUMMY!

For a REAL tutorial on how to make these.
  House of the Hepworths has a great tutorial!
CupcakeConesRound4cupcakeconesintro
Click HERE for her tutorial.

Sunday, June 5, 2011

Chapstick Tutorial, Templet & Free Pinkalicious Label


One of my daughter's favorite things is Chapstick. A collector of lip balm one may even call her. I decided that for her party it would be fun to make little personalized chapsticks for her and her friends.
There was several ways I could do this.
  • Martha Stewart has a great tutorial on making lip gloss here
  • I could order the supplies from CandleLynnSupplies on Etsy to do a little DIY
  • I could buy Chapstick and replace the labels
I decide to "sorta" make my own the #2 Etsy way.  Here's how:
  1. Gather Supplies-Lip Balm Base, tubes, and flavor
  2. Melt your base in the microwave. Checking and stirring every 30 seconds until it liquifies
  3. Add your flavor. I just guessed and added drops until I thought it tasted "right".  My daughter's choice of flavor was Monkey Farts and Cotton Candy. hmmmm...
  4. Fill your tubes. I used a small plastic bowl to keep the tubes from falling over. 
  5. Let harden. I popped mine in the Fridge for about an hour. 
Now for the Wrappers:
I have already been warned by Aubrey's 5 year old boy friend that he will not eat a pink cupcake so I decided to spare her the embarrassment and make a few boy labels too. lol

To make the wrappers I simply found images online and edited them in Picnik. Pinkalicious for the Girls and Monsters Inc. for the boys. In Picnik I cropped the images into a square, then added the oval sticker for their names in white and topped with my text. Easy Peasy. LOVING PICNIK! Then I saved the image to my desktop and dragged the image {copy and paste}to the word template, resized to fit in the template box and repeated as necessary. DONE! Again, Easy Peasy!

Here is the Pinkalicious chapstick label I made. You are more than welcome to use it. Just Click on the image then Right Click and save to your computer and add your own Text.


This was a  huge time saver! Blank MS Word Chapstick Template HERE

To attach my labels I used standard packing tape and plain printer paper.. I was pretty proud of myself for discovering this :) It worked out fabulously. I'm pretty sure I'm not the first person but hey...

Here is how to attach the labels:

  1. Gather Supplies- Packing Tape, Printed Paper, Scissors, blank filled chapstick tube
  2. Cut your labels out on the dotted lines and cover with packing tape. Trim the edges of tape that hang over the sides. Do not cut the tape off the ends. You will need this to secure the label to the tube.
  3. Wrap around the Chapstick and smooth the tape down. It will look seamless.
  4. Easy, Personal and cute!!!


HAPPY 
5th BIRTHDAY 
AUBREY ROSE!!!!!!
xoox

DIY Club

Thursday, May 26, 2011

Little Pink Cake-Guest

Hi my name is Kathia and I have this little blog called Pink Little Cake I love to bake desserts, cakes and cookies and one of my passions is cake decorating. I started blogging as a way to share with others some of my creations as well to interact and learn from the blog community.
I am so happy to be here and thank you so much to Kelly for the invitation to guest post.
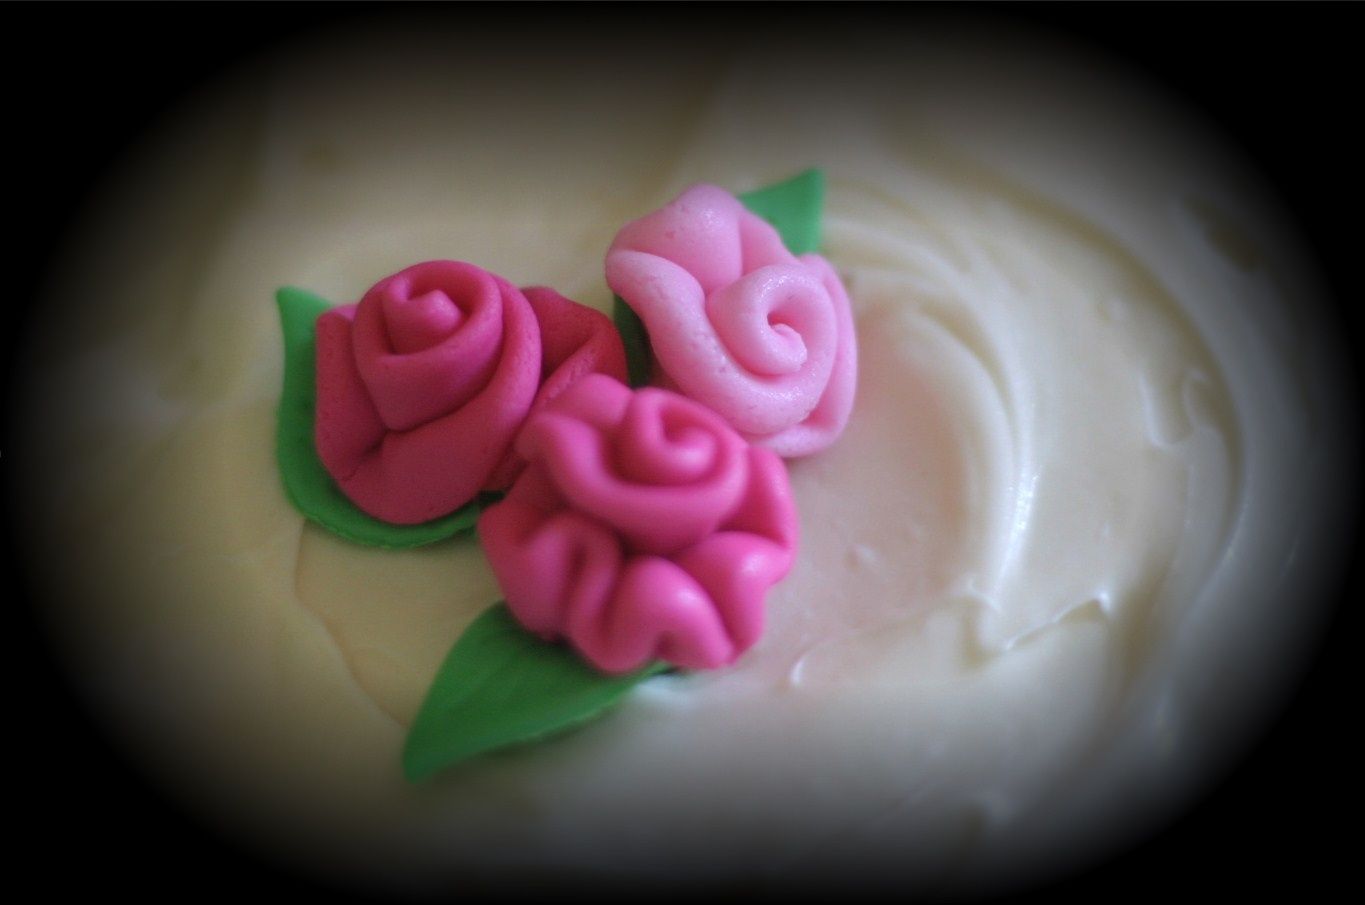
Ribbon Roses are so easy to make and they look great as a cupcake toppers or to decorate any cake.
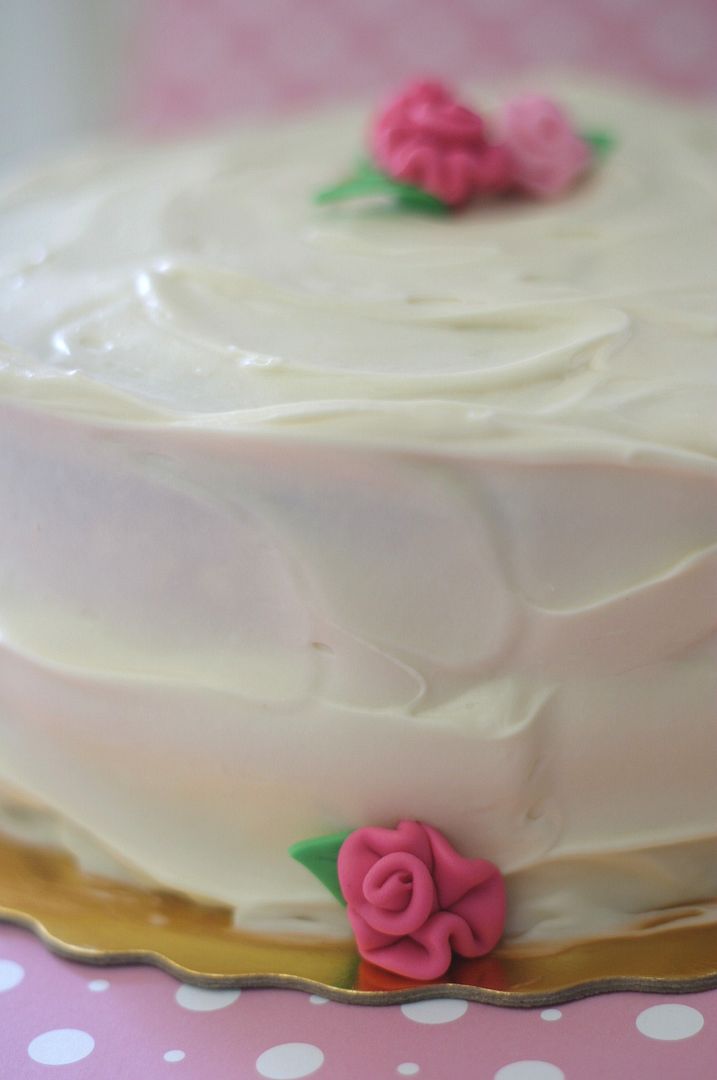
Every Easter we go to one of my  friend's house, my usually to go dessert to bring  is Carrot cake. This year I wanted to add a little splash of color to the cake and added some ribbon roses which are way too easy to make and they always end up looking like you spent hours making them.

Photobucket

To make ribbon roses you will need:
-Fondant in the color of your choice for the roses
-Green fondant for the leaves
-Small rolling pin to roll the fondant
-Small leave cutter
-Brush ( to attach leaves to roses)
-Pizza cutter or exacto knife
To make the ribbon roses:
-Roll the colored fondant with the rolling pin and cut a few stripes, you can make them the same size or different sizes, it doesn't really matter.
-Fold each piece over
-Take one end of the folded stripe and fold down to form a center, and continue rolling until you get the size that you want.

Photobucket

I do not like to roll the roses too tight, I like mine in the softer side.
-When you have reached the size you want, bring the end down, pinch it and cut it.
-Then leave the roses to dry or use them right away.
Photobucket
To make the leaves:
-Roll the green fondant and using a small leave cutter cut all the leaves that you are going to need.
-Using a small veining tool add leaf details.
Photobucket
Attach the leaves to the roses with a dab of water and arrange in cake.
Photobucket

Have a great week and I hope you find this tutorial useful, if you want to learn a little more about cake decorating feel free to stop over my blog any time!
Photobucket


Wednesday, May 18, 2011

Guest Post-The Lemonista


Today your in for a real treat. 
My friend Erin from The Lemonista is our guest blogger. 
She is amazing talented. 
She always is cooking up something yummy and has a
 very special lemon tree! Did I mention she just finished writing a book? 

Check out some of her Bento Lunches here

And Cakes here


YUMMY! Thank you Erin for being our guest today! Please stop by her blog and tell her hi!

I'm so excited to write my first guest blog for Glitter today! 

I thought I'd post a simple elegant dessert that can be whipped up in a flash for any special occasion.

Growing up, Strawberries with Cream Cheese Topping was one of my Dad's specialties and a treat my sister and I always looked forward to. Fresh strawberries are the star of this sweet creamy dessert, so this is especially good when the berries are in season.
You will needed the following ingredients:

Soften your cream cheese by bringing it to room temperature and whip smooth in a mixing bowl.

Add 3/4 cup of Confectioners Powered Sugar and 3 tablespoons milk.  Whip until smooth with an electric mixer.

Cut ripe strawberries in half and pile them in a pretty serving dish.

The French Haviland dish I've chosen today was a gift from the wife of one of my husband's partners at his firm.  *swoon*  It's no secret that I have a romance with my dishes. There's nothing like a pretty dish to make your food sing!

The bottom of the dish has the artists initials and the year it was made painted in gold.
 Strawberry cream cheese 003
Spoons some of the cream cheese topping onto the strawberries and serve immediately.

If you would like to make this dessert a head of time, just place the cut berries and cream cheese topping in the refrigerator in separate bowls until ready to serve.
Strawberries with Cream Cheese Topping
Serves 4
1 8oz package cream cheese
3/4 cup confectioners powdered sugar
3 tablespoons milk
1 16oz container fresh strawberries (or more if you like)
Soften your cream cheese by bringing it to room temperature and whip smooth in a mixing bowl. Add 3/4 cup of Confectioners Powered Sugar and 3 tablespoons milk. Whip until smooth with an electric mixer.  Cut ripe strawberries in half and pile them in a pretty serving dish. Spoons some of the cream cheese topping onto the strawberries and serve immediately.
*If you would like to make this dessert a head of time, just place the cut berries and cream cheese topping in the refrigerator in separate bowls until ready to serve.
Thank you so much, Kelly, for hosting me today.
Enjoy!
~The Lemonista

Monday, May 16, 2011

Lip Smacking Good Dog Treats!

Lip smacking good dog treats!
I have a couple of dog treat snob dogs. I don't blame them! 
Have you read the ingredient list on the store bought ones?... YIKES

I thought I would share a great recipe that my doggies gobble up.

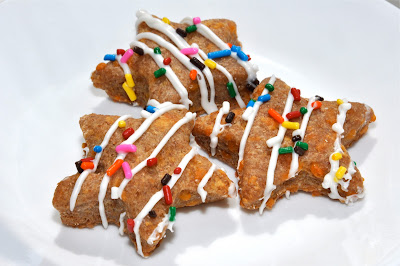
Chicken & Cheddar Dog Treats 


1 1/3 c wheat flour
1 c shredded cheddar cheese
1/3 c + 1 Tbsp low sodium chicken broth (no onion!)
1/4 c vegetable oil


Preheat oven to 350°F.
Combine all ingredients in small bowl. Mix until ingredients combined. Add additional Tablespoons of broth if dough is too dry. Flour work surface. Roll dough to 1/2″ thickness. Cut into desired shape 
Bake in preheated oven for 25-30 minutes (depending upon size). You want them firm but still a little chewy when you take them out of the oven. Cool and store in airtight container.

{Action Shots}

Roll out dough :)


  I used the Smallest star in the Wilton star set I got from Wal-Mart

If you want to Ice your doggie treats a great recipe for icing is here
Fun to make and 0 calories for me! 
{I was only a little tempted to try them}

Saturday, April 30, 2011

My First Jars of Jam=YUMMY


My first attempt at Strawberry Jam and it is YUMMY!!!!
Simply lovely and yummy! It doesn't get better than that.
I used Ball's Low Sugar/No Sugar Pectin. It was Perfect not too sweet, not too tart. 
I just made two small batches of 6 half-pint jars: 3 jars of Strawberry and the other 3 jars Strawberry Grape {I substituted grape juice for the water}. For the Strawberry batch I wanted it chunky so I hand sliced my strawberries and for the Strawberry Grape I pulsed them a few times in my blender for a smoother consistency.  I feel confident to try a larger batch this weekend. Maybe Peach? These will make great Mother's day and Teacher Appreciation gifts!
I followed a great tutorial from Home improvements and Gardening HERE and a combination of the packaged directions.  There are hundreds of great recipes and tutorials on making Jam when I searched Google. Lots of great info out there! If you would rather make Freezer Jam, Mom's by heart linked up a great tutorial a few weeks ago. You can find her Tutorial HERE


The graphics I used as labels on the jars came from Free Pretty Things For You. I added text to the image in Picnik. then printed a sheet of the labels on sticker paper, and finally cut the labels out.
 If you have not made Jam before, have no fear and go ahead and give it a try.  I promise it is not that complicated and well worth the labor of love put into it. 


{Link Parties I join here}
{Join, this Weeks Running With Glitter Link Party here}

Wednesday, April 20, 2011

Strawberry Cheesecake Pie


Some of my favorite recipes I find on the back of the packaging at the store.
 I found this yummy recipe by Keebler on the pie crust paper.
Because I'm trying to kick this winter 10 pounds I used all low/no/reduced fat ingredients and it 
was only 150 calories or so per *small* slice and so good. 
My husband complimented this a ton and I even found him eating 
it in the kitchen after the kids went to bed BUSTED!
 So this is for sure going in the recipe box!


Strawberry Cheesecake Pie
Ingredients per Packaging:
1 package (8 oz.) cream cheese, softened*
1/2 cup sugar
1/2 cup sour cream
1 teaspoon vanilla
2 cups frozen non-dairy whipped topping, thawed
Keebler® Ready Crust® Shortbread Pie Crust
2 cups fresh strawberries, halved
  • Directions:
  • 1. In small mixing bowl beat cream cheese on medium speed of electric mixer until fluffy. Add sugar, sour cream and vanilla. Beat until combined. Fold in whipped topping.
  • 2. Spread cream cheese mixture in crust. Refrigerate at least 4 hours or until set.
  • 3. Arrange strawberries on top of pie. Store in refrigerator.
  • *NOTE: Soften cream cheese in microwave at high for 15 to 20 seconds.

Wednesday, April 13, 2011

Pastel Spring Cupcakes

Remember the Rainbow Cupcakes I made for St. Patricks day? I loved them so much I wanted to give them a try again.
 I made these the exact same way except this is the spring rendition. A little strawberry frosting and pastel food coloring... YUMMY 
Someday I will venture out of the "box" and make cupcakes and icing from scratch... For now Betty Crocker and Pillsbury ingredients will do just fine. :) 
They were just as yummy this time around!


{Don't forget to Enter the Bowdabra Giveaway HERE
And join this weeks link party here}
Related Posts Plugin for WordPress, Blogger...