


I'm really excited about this guest post! This week I made a cute felt rosette and shared the tutorial with you. Today, Lori from Beneath The Rowan Tree is going to share how to make even more felt pretties.
If you have never seen her blog you are in for a treat! She is so fun and has the best projects. Oh, and don't forget to check out her Etsy shop.. she has some very unique and fun things for sale.
I'm already starting my kid's Christmas list.
Welcome Lori!

Hi! I'm Lori~ the one with the dye stained hands at Beneath The Rowan Tree
I am the mom of one, working on adopting two. I blog about the simple, creative life we try and lead in Northern Ontario, under our little rowan tree by the lake. Tutorials, ideas and lots of handmade stuff from our shop at Beneath the Rowan Tree , too.
It is so much fun to be guesting at Running with Glitter!
It is so much fun to be guesting at Running with Glitter!
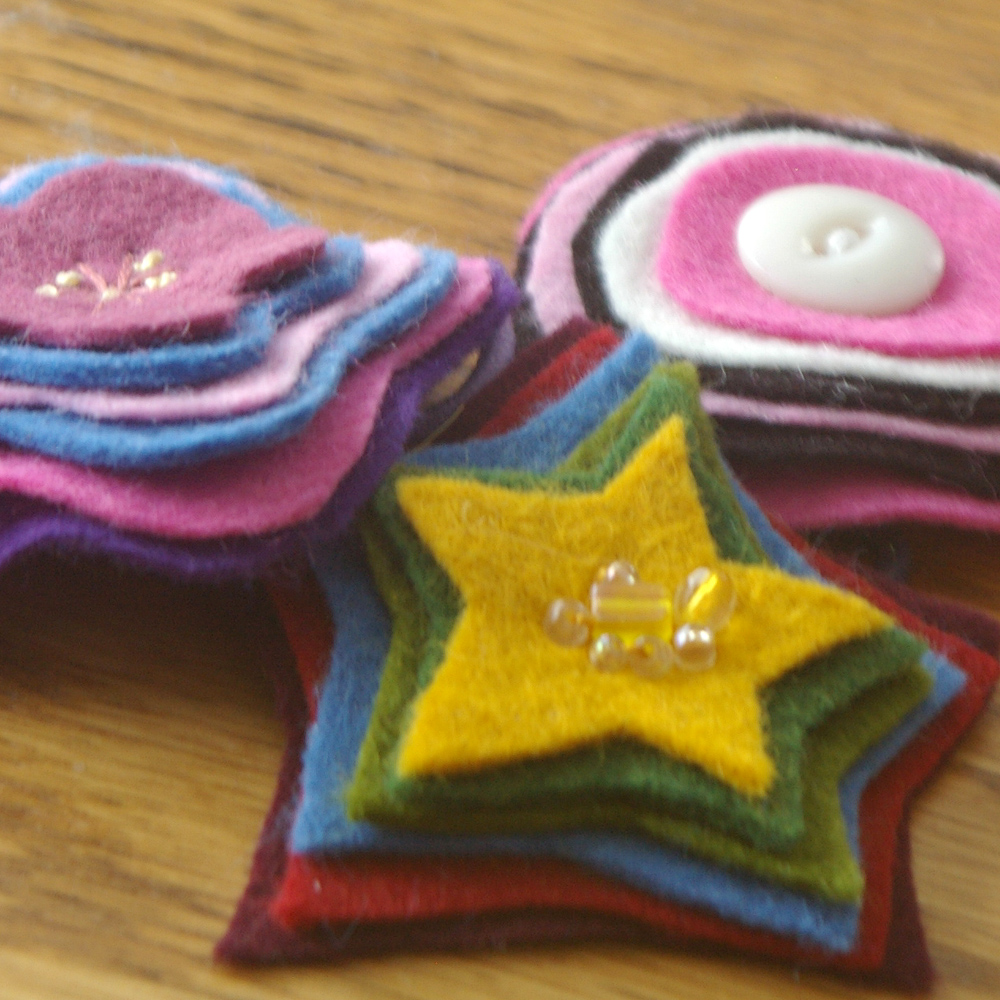
These simple accessories are perfect for using up felt scraps!
Stack circles, stars, flowers and more... the sky is the limit and they only take a stitch or two, or even glue, to finish.

Materials:
- Felt (wool, eco or acrylic, thicker felt will offer a lusher finish)
- Sharp scissors
- marker
- paper
- needle and thread (embroidery floss is perfect)
- hair elastics (we like Goody Ouchless) or bobby pins, alligator clips etc. (available most places that sell jewelry findings)
- white glue/ tacky fabric glue as desired
- if using metal findings, choose an appropriate adhesive
- Buttons, beads, sequin, ribbon as you choose

1) Decide on the shape of your hair pretty. Draw the smallest (center) piece to the desired size. Cut out this template, pin to a scrap of felt and cut it out.

2) Using this small piece, cut each succeeding piece slightly larger to create the stacked effect. Cut as many pieces in as many colours as you heart desires. Keep in mind, that if pieces grow too large, they may begin to flop over on themselves.


3) Once you have cut and stacked your pieces, choose a coordinating or complementary thread and stitch through the center several times to attach the pieces. You could also glue the pieces together, but keep in mind, if you plan to stitch on any details, it is difficult to stitch through glue stiffened felt! Keep it simple OR add decorative flair!

4) Embellish as you wish! Beads, embroidery stitches and ribbon are great additions! Buttons, too.

5) Attach your finished piece to the hair accessory of your choice. Stitch securely to hair elastics. Glue to other findings. You may find it hard to get your felt to adhere to the metal. If you do, spread a thin layer of adhesive on the back of the felt piece in the area you need to glue. Let this dry and adhere it to the finding (this creates a surface more suited to connecting with the metal).

Turn these into brooches, ornaments, gift tags and more... and have fun! ♥


The text and photographs are protected by copyright law.
The finished items are yours to keep, give or sell!
©Beneath the Rowan Tree, 2010.
Lori,
I LOVE IT! Thank you for sharing your talent here on the Glitter Blog.
I can't wait to make a few of these this weekend!
xoxo
Kelly