Pages

Sunday, July 10, 2011

Mommy & Blog Business Card, Free Download & Mini Picnik Tutorial


I'm constantly finding myself jotting down my blog address on a napkin or random wadded up receipt from my purse for people. I'm also a mommy and always wishing I had a mommy business card... You may laugh now but you will think of this post next time you are digging for a scrap of paper to jot your name and number on for someone. {maybe..lol} 
I decided it was time to make my card.


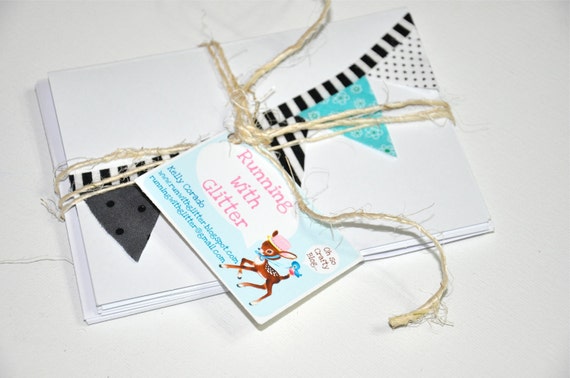
Love, Love, Love these

This is so, so simple and took me less than 10 minutes. Really...it was so simple I almost skipped sharing this.

Keren at Free Pretty Things For You {my most favorite place for images EVER} has a free download of both of the images I used to make these cards. 
  • Click Here to download the images. Save to your computer.
  • Open Picnk and upload the image. If you're new to picnik it is amazing and FREE for most features. {I do have the paid version and it is well worth it.}
  • Click on the create tab at the top and choose "text"'
  • Type your text in the text box click "add"
  • Choose your font and font color. {for mine I chose Love Ya Like A... and used the dropper to match the font color}
  • Position and Resize.
  • Do the same steps as above for adding your name and e-mail and any other details you would like
  • Click "Save and Share"
  • Done! Now resize and print {I used my Silhouette SD software to resize to a little under 2 X 3 inches, copied the image and filled up the page then printed them on cheap photo paper.}
Bunting Pennant Banner Note Card- Set of 6

See I told you it was easy...And totally cute! Can you tell I'm kinda excited about my cards? It's the little things..... Bye for now and have a great day!


35 sweet comments:

  1. Love these! I need some mommy cards

    ReplyDelete
  2. Adorable, I have blog business cards but mommy ones would be great too.

    ReplyDelete
  3. These are so cute and thanks for the reminder it's time Chameleon Girls had business cards.

    ReplyDelete
  4. You know I am So going to brag about you :D!

    ReplyDelete
  5. So adorable! Love Free Pretty Things!

    ReplyDelete
  6. Thank you, thank you, thank you!!! I just opened an account with Picnik & I LOVE it!! So fun & user friendly! :)

    ReplyDelete
  7. I actually had someone give me a mommy card not that long ago and I thought it was a great idea. Thank you for sharing.

    ReplyDelete
  8. Thanks for sharing Kelly!! So cute! I need to get this done as well. When you do it in picnik do you have to upload a picture first so you have a background (something to work with) then add the text and stuff?? I tried to go into picnik to create a handout and couldn't figure out how to do it cause it seemed like I needed to upload a picture first so I could get a background. Would love any advice! :-) Great job Kelly.

    ReplyDelete
  9. Trina, I just sent you an Elian but in case you miss it. I did my first project In picnik a while back and linked a couple if tutorial where I learned how to nav the site :) I hope that helps. If not please let me know. http://runwithglitter.blogspot.com/search/label/Pinkalicious%20Party
    The only way to get a solid layer or background is by covering your photo with a digital sticker.

    ReplyDelete
  10. Sorry for the above typos. I'm on my iPod and have fumble fingers :).

    ReplyDelete
  11. Hi I LOVE the name of your blog and your header!!! I am a new follower from Petite Hermine's Linky Party.


    For Love of Cupcakes

    ReplyDelete
  12. very sweet, and so great to have on hand. I finally had some cards made myself and no more jotting down on little scraps of paper! thanks so much for sharing on Craft Schooling Sunday!

    ReplyDelete
  13. You are right. Mommies DO need business cards.

    ReplyDelete
  14. These are so sweet and frugal! Thanks for sharing the tutorial. Please stop by www.laughloveandcraft.com and link up to my Share the Wealth Wednesday Link Party! I'm your newest follower!

    ReplyDelete
  15. I have soo been thinking of making blog business cards, but wasn't sure where to start!! Thank you so much for sharing this, you must have been reading my mind!! :)

    ReplyDelete
  16. These are so cute! Thank you for sharing the how-to. I loooove Picnik! I have been wanting to make some cards for my blog, but it never occurred to me to make mommy cards...now I totally need some :) Awesome! Found you at Tip Junkie and will be back!

    ReplyDelete
  17. So cute! Off to design a new card. Thank you for sharing!

    Alyssa @ http://sweetsewnstitches.blogspot.com/

    ReplyDelete
  18. Yay! I've been wanting to make some and now I can!
    Nay
    www.covertocoverandbetween.blogspot.com
    check out what I love...

    ReplyDelete
  19. Love these!!!
    Thanks for sharing...
    :)

    ReplyDelete
  20. Those cards are great "little things"! Glad you decided to post them :)

    -caroline @ c.w.frosting

    ReplyDelete
  21. So cute! I am so going to make myself some! Thanks!

    ReplyDelete
  22. So cute. I made mommy cards for myself when my daughter was born & I think it's a great idea (of course!) but yours are much cuter than what I made!

    ReplyDelete
  23. I've never heard of this idea... HOW CLEVER! Thanks for the tutorial! Found you on Remodelholic.

    I would love for you to link it up at my weekend Link Party, Once Upon a Weekend. Today is my first-ever party, and I am so hoping someone will participate! :)

    Here's the link if you're interested:
    http://familyeverafter.blogspot.com/p/link-party.html

    Also, if you have a list of favorite link parties, I'd love to be included on Fridays. Thanks a ton!

    ReplyDelete
  24. Thanks for the information. I actually have business card stickers and I know how to use picnik. I usually just use it for blog buttons and headers. Just so you know, I have your blog mentioned under my favorite blogs on this page:

    http://katspurrfectboutique.blogspot.com/p/favorite-websites-and-blogs-i-read.html

    Thanks, Katharine

    ReplyDelete
  25. Awesome! Thanks for sharing:) I found you at Tatertots and Jello.

    ReplyDelete
  26. This is such a cute idea! Thank you for the inspiration!

    ReplyDelete
  27. These are so wonderful!!!!!!!!!! I have 0 idea how to make it so the image is over and over on a page :(

    ReplyDelete
  28. its a cool idea.the only way to get a solid layer or background is by covering photo with a digital sticker.
    Plastic Card

    ReplyDelete
  29. Hey Kelly, I gave you a little shout out today on my blog!
    You can read it here! I hope it's okay with you:)
    http://www.frugaliciousme.com/2011/09/totally-tasha-tuesday-call-me.html

    XOXO,
    Tasha
    www.frugaliciousme.com

    ReplyDelete
  30. Some great ideas there, is one of the best I've seen up close. It is so complex and technically simple, and Apple really.

    ReplyDelete
  31. That is so adorable i want to have some memory cards.

    Clear business cards

    ReplyDelete
  32. I genuinely like your post information the way you put standard business card dimensions up the things…I have browse through the subject with awesome interest.

    ReplyDelete
  33. Love this idea! I'm a new follower because I couldn't stop gawking at all your posts. Cute stuff! Come check me out sometime. http://three65create.blogspot.com/

    ReplyDelete

Related Posts Plugin for WordPress, Blogger...